Note: These instructions were originally taken from https://www.sitepoint.com/how-to-install-php-on-windows/ and slightly modified.
Step 1: Download the files
Download the latest PHP ZIP package from https://www.php.net/downloads.php by clicking on "Windows Downloads".
Step 2: Extract the files
We will install the PHP files to C:\php, so create that folder and extract the contents of the ZIP file into it.
PHP can be installed anywhere on your system, but you will need to change the paths referenced in the following steps.
Step 3: Configure php.ini
Copy C:\php\php.ini-development to C:\php\php.ini. There are several lines you will need to change in a text editor (use search to find the current setting). Where applicable, you will need to remove the leading semicolon to uncomment these setting.
Define the extension directory:
extension_dir = "C:/php/ext"Enable the following extensions. (The extensions you will want to enable will depend on the libraries you want to use, but the following extensions should be suitable for the majority of applications.)
extension=curl
extension=gd
extension=mbstring
extension=openssl
Step 4: Add C:\php to the path environment variable
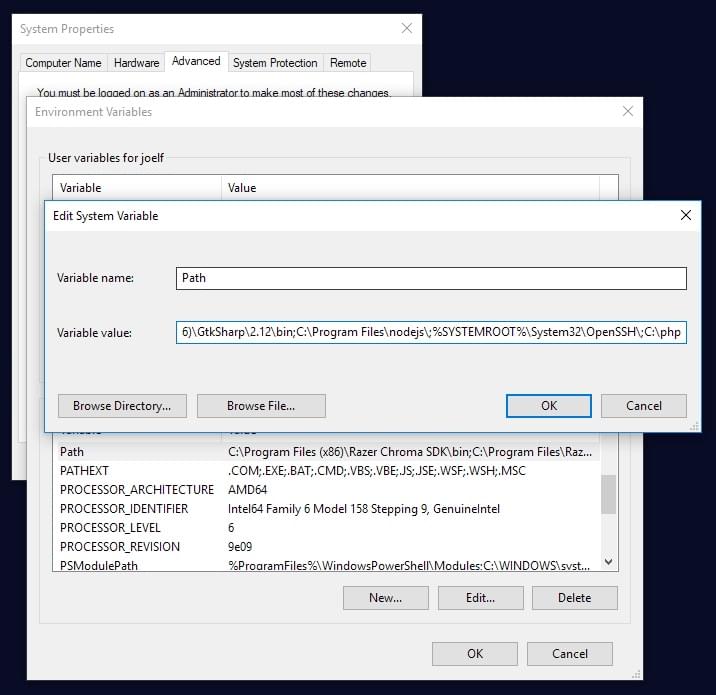
To ensure Windows can find PHP, you need to change the path environment variable. Open Settings, type environment variables into the search field and open the result. Select the "Advanced" tab, and click the "Environment Variables" button.
Scroll down the System variables list and click on "Path" followed by the "Edit" button. Click "Edit text" and add ;C:\php to the end of the Variable value line (remember the semicolon).
Now click OK until you’re out. You might need to reboot at this stage.
Step 5: Test it out
Open up your command line interface and type in php -v. Hopefully you see the version of php that you installed.